

How To Make a Website (for free)
An Outline Guide of HTML & CSS and How To Host A Website Through Github Pages


Hello There! A Lot Of People Really Want To Know about the steps to create a Website. I get it, you have no clue whatsoever to create a website.
We Will Dive a Bit into the Technical Stuff first, Because We Really Need To Understand What The Hell is A Website, Then We Need to Understand the Basics of a website, Get Stuffed Up and Begin To Code. It's Really That Easy.
The Guide (might) contain a bit of 2021 humor and some Gen-Z Slangs, But I can't really help with that. I also suggest you to go through the Entire Article and not skip any topics, well that is, if you're just starting out.
Let's begin
History of The Internet. What? When? Why?
The internet as we know it today has its roots in the late 1960s, when the U.S. Department of Defense's Advanced Research Projects Agency (ARPA) created a network called ARPANET. The goal of ARPANET was to connect researchers and scientists across the country to facilitate the sharing of information. Over time, ARPANET grew and evolved into the modern-day internet.
So, what exactly is the internet? (ba dum tss)
At its core, the internet is a global network of interconnected devices and computers that communicate with each other using a standardized set of protocols. These protocols allow information to be transmitted across the network quickly and efficiently. As an Article From GFC Global Says:
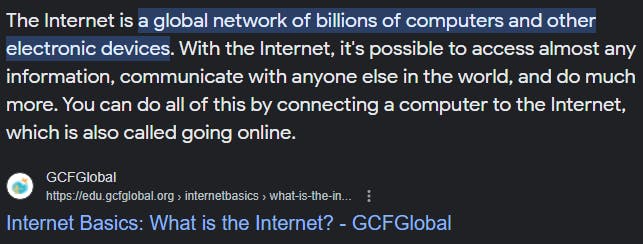
A website is basically a collection of web pages that are hosted on a web server and can be accessed by people over the internet. Think of it like a digital storefront for your portfolio or personal brand. Instead of displaying your details or services on a physical shelf, you're showcasing them on a virtual shelf that anyone can access from anywhere in the world!
To access a website, you simply type in the website's address (or URL) into your browser's address bar. Your browser sends a request to the website's server, which then sends the requested web page back to your browser. It's like a ping-pong match, with alot of players. The Point to Notice Here, is all of this Magic, Happens under literal milliseconds. Which is Magnificent.
A Better, Deeper and Biased (obviously) Version of History of the Internet is Coming Soon, on The Same Blogpage
What's A Website? and How To Create it for Free?
The Term 'Website' is a very vague term. A Collection of Webpages is known as Website. Basically, A Simple Page Without Links to Other Webpages is known as a Webpage. A Site that networks between Webpage to Webpage, is known as Website. Like The Article You're Currently Reading, is A Webpage. My Portfolio Page is A Webpage. And There are A Collection Of Webpages Like This. Same With This Article. This Networking of Webpages to Another is what makes your 'Webpage' to a 'Website'.
A Website can also be Distinguished by it Being Static or Dynamic. If A Website Does Something on User Input, is Dynamic. The Website That is Entirely for The Sole Purpose of 'Show-Off' is... (guess first idiot) STATIC
I don't have much time and Patience to Explain Stupid Stuff to a Stupid Being Like You, Therefore I would jump straight on: "How, A Stupid Being Like You, Can Create A Website!!"
Now I know you, You Have No Money. You are a broke person haha. (im making fun of you) Or (🎵 Can We Skip To The Bright Side? 🎵) You're Responsible With Your Finances and Don't Want To Spend Your Life Savings on Worthless and Irrelevant Pixels on The Internet? Don't Worry, I got you a free Option (with some limitations that is)
How To Create A Website
it took too long to reach this part ngl
aight, the first thing i want you to do is sign up on github (https://github.com)
its honestly quite simple, choose an email, password and username
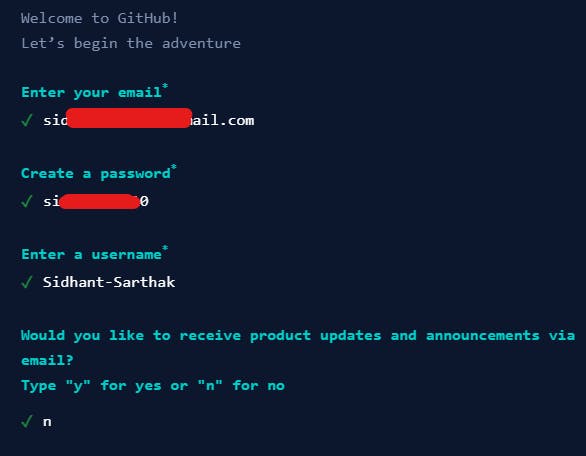
look you need to be technical enough to understand how to sign up or else i am not guiding you. you dont deserve a website.
Then You Need To Follow All of The Steps Given in This Workflow: (click the embed below)
The Workflow Will be Of About 46 Second and I recommend you to follow each step as you're just starting out. (i know u, i have been secretly spying on you)
Remember the worthless piece of text we pasted through the workflow:
<!DOCTYPE html>
<html lang="en">
<head>
<meta charset="UTF-8">
<meta http-equiv="X-UA-Compatible" content="IE=edge">
<meta name="viewport" content="width=device-width, initial-scale=1.0">
<title>My Personal Website</title>
</head>
<body>

</body>
</html>
We Will Continue To HTML, the structuring language for a Website:
HTML: The Skeleton; CSS: The Skin
The World of HTML and CSS is Wonderful. The Topic is Point-Wise Described to Provide A Better Aspect of Coding.
First things first: HTML stands for Hyper Text Markup Language. It's a coding language that allows you to create and structure content on the web. It was created by some dude with glasses, so respect people with glasses. cuz they pay to see you. (and also do so good to the world)
CSS stands for Cascading Style Sheets. It's a language that allows you to style your HTML content and make it look pretty. (like me obviously)
To get started with HTML, you need to create another
.htmlfile in your github repository or Edit the one Html File You Just Made, Which was Probably Your First Web-page. Then, type in the following code:
<!DOCTYPE html>
<html>
  <head>
    <title>My First Webpage</title>
  </head>
  <body>
    <h1>Hello World!</h1>
    <p>This is my first webpage.</p>
  </body>
</html>
- Congratulations! You just wrote your first HTML document. (we dont really count the one before this one), The First Thing You Want To Do, is To Shut The Hell Up, It's Not really that big of an achievement. also, You Can Access Your Webpage at https://[username].github.io
Let's break the HTML down:
<!DOCTYPE html>tells the browser which version of HTML you're using.<html>is the start of your HTML document. (duh..)<head>contains information about your webpage, such as the title and any scripts or stylesheets you want to link to. (just like how your head contains nothing eheheheh)<title>is where you specify the title of your webpage. (GET FREE BOBUX 1000% free no credit card ROBLOX GAME <- my dear lawyers, that was a joke)<body>is where you put all the content that you want to display on your webpage. (basically like the human body, that contains all vital organs - "not a good example sarthak, grow up")<h1>is a heading tag, and it's used to create a main heading for your webpage. (IT CREATES BIG TEXT, it progressively gets smaller, h2 is smaller than h1, h3 is smaller than h2 and so on)<p>is a paragraph tag, and it's used to create paragraphs of text. (so you can endlessly debate about a topic)
Now let's add some style to your HTML document using CSS. To do this, you need to add a
<style>tag to the<head>section of your HTML document, like so (style helps you get ahead of the basic look yo ugly ass has been using for the past 12 months):<!DOCTYPE html> <html> <head> <title>My First Webpage</title> <style> h1 { color: blue; font-size: 24px; } p { color: red; font-size: 16px; } </style> </head> <body> <h1>Hello World!</h1> <p>This is my first webpage.</p> </body> </html>- You just styled your HTML! Let's break down the CSS or the skin:
h1andpare called selectors, and they're used to select the HTML elements that you want to style. (just like how my history teacher selectively processes each child's answers){}is used to contain the CSS properties that you want to apply to your selected elements. {contained in; full peace}coloris a CSS property that sets the color of your text. (magic)font-sizeis a CSS property that sets the size of your font. (big font go brr)
Now let's try something a bit more advanced. (lets see if ur teeny tiny brain can handle this torture) Let's create a navigation menu. To do this, you'll need to add a
<nav>tag to your HTML document, like so:<!DOCTYPE html> <html> <head> <title>My First Webpage</title> <style> h1 { color: blue; font-size: 24px; } p { color: red; font-size: 16px; } nav { background-color: gray; height: 50px; } ul { list-style: none; margin: 0; padding: 0; } li { display: inline-block; margin: 0 10px; } a { color: white; text-decoration: none; } a:hover { color: yellow; } </style> </head> <body> <nav> <ul> <li><a href="#">Home</a></li> <li><a href="#">About</a></li> <li><a href="#">Contact</a></li> </ul> </nav> <h1>Hello World!</h1> <p>This is my first webpage.</p> </body> </html>- Here's what you just did: (im too tired to explain all of this in a gen-z tone, but i will give it a shot)
Added a
<nav>tag to create a navigation menu. (nav = navigation)Added a background color and height to the
<nav>tag to make it stand out. (so the nav tab has more height than youand is a different race)Styled the
<ul>tag to remove the default bullet points and any extra margin or padding. (basically the points you see here that are not numbered are ul, this point is a ul)Styled the
<li>tag to display the menu items side-by-side and add some margin between them. (made a sneaky margin in the li tag)Styled the
<a>tag to change the color and remove any underlines. (the a tag redirects you to a website <- like this)Added a hover effect to the
<a>tag to make it change color when the user hovers over it. (so that when you bring your mouse over it, magic happens)
Congrats! You just created a navigation menu using HTML and CSS. (
shut the hell up, its actually not that big of an achievementhonestly buddy, i am proud of you)One last tip: don't be afraid to experiment and try new things with HTML and CSS. The best way to learn is by doing, so keep practicing and don't give up. And remember, web design can be fun and creative, so enjoy the process!
This is the basic Process of making Websites for free, Visit W3 School's CSS Guide for a more detailed version and designing of CSS
To the rich lads,
imma bereal with u chief, i too host my site on github, but if you want a better host, i'd suggest using bagel.land, a great hosting provider that provides the best and cheapest web server hosting (possibly in the whole universe)
if you like a custom domain, like sarthaksidhant.me (flex) or website.com, i'd recommend namecheap or google domains
if you want a custom website and are too lazy to create one, there's always me and my shop or decodificate (website)
I acknowledge that creating a website like mine can be hard, but you could always rely on google and stackoverflow for the stuff. you need to toil to create a near perfect website
- Sarthak Sidhant
Founder - Sidhant Hyperspace
sarthaksidhantisopolice@gmail.com my bento and my github
please subscribe to my newsletter
